Getting started
Introduction and overview
Section titled “Introduction and overview”XpressReal T3 is the first SBC in the XpressReal family. Developed in collaboration between Fyde Innovations, Radxa and Realtek, XpressReal T3 is a compact SBC powered by the advanced RTD1619B SoC — delivering robust performance, seamless media processing, extensive developer resources with comprehensive SDK and OS support, and top-tier connectivity in a palm-sized package. Engineered for flexibility, it’s the perfect companion for FydeOS Enterprise Kiosk solutions and beyond.
Preparation
Section titled “Preparation”Power Supply
Section titled “Power Supply”XpressReal T3 can be powered by Type-C connector with 12V input voltage(your PD power supply need to support this voltage), recommended to use a power supply with a rated maximum current greater than 2A.
Boot Media
Section titled “Boot Media”There is no stock firmware in the onboard eMMC, you need to prepare a microSD card with at least 8GB capacity to install the OS image.
If you need to install an image with desktop environment, please use a microSD card with at least 16GB, 32GB is recommended.
microSD card reader
Section titled “microSD card reader”For flashing the system image.
Display
Section titled “Display”The XpressReal T3 has a HDMI video output port on board, which requires a standard HDMI cable to connect to the monitor.
The resolution of the HDMI output depends on the monitor, and the XpressReal T3 will adjust to the optimal display resolution according to the monitor.
Networking
Section titled “Networking”The XpressReal T3 has a WiFi/BT module on board, which can connect to your wireless network. You can also use a ethernet cable to connect network with the onboard GbE ehternet port.
Type-C Hub
Section titled “Type-C Hub”The XpressReal T3 has a onboard Type-C USB3.0 port. Connect a USB hub to this port if you need more USB connections(Eg. keyboard and mouse)
openFyde/FydeOS Image Download
Section titled “openFyde/FydeOS Image Download”Go to Resource Download to download openFyde/FydeOS image file.
Prepare Installation Media
Section titled “Prepare Installation Media”We recommend using the open-source image flashing tool Etcher, developed by Balena. Etcher has a user-friendly interface and powerful features, with support for Windows, Linux, and macOS systems. Next, we’ll show you how to use Etcher to write an image to an SD card.
- Open Etcher
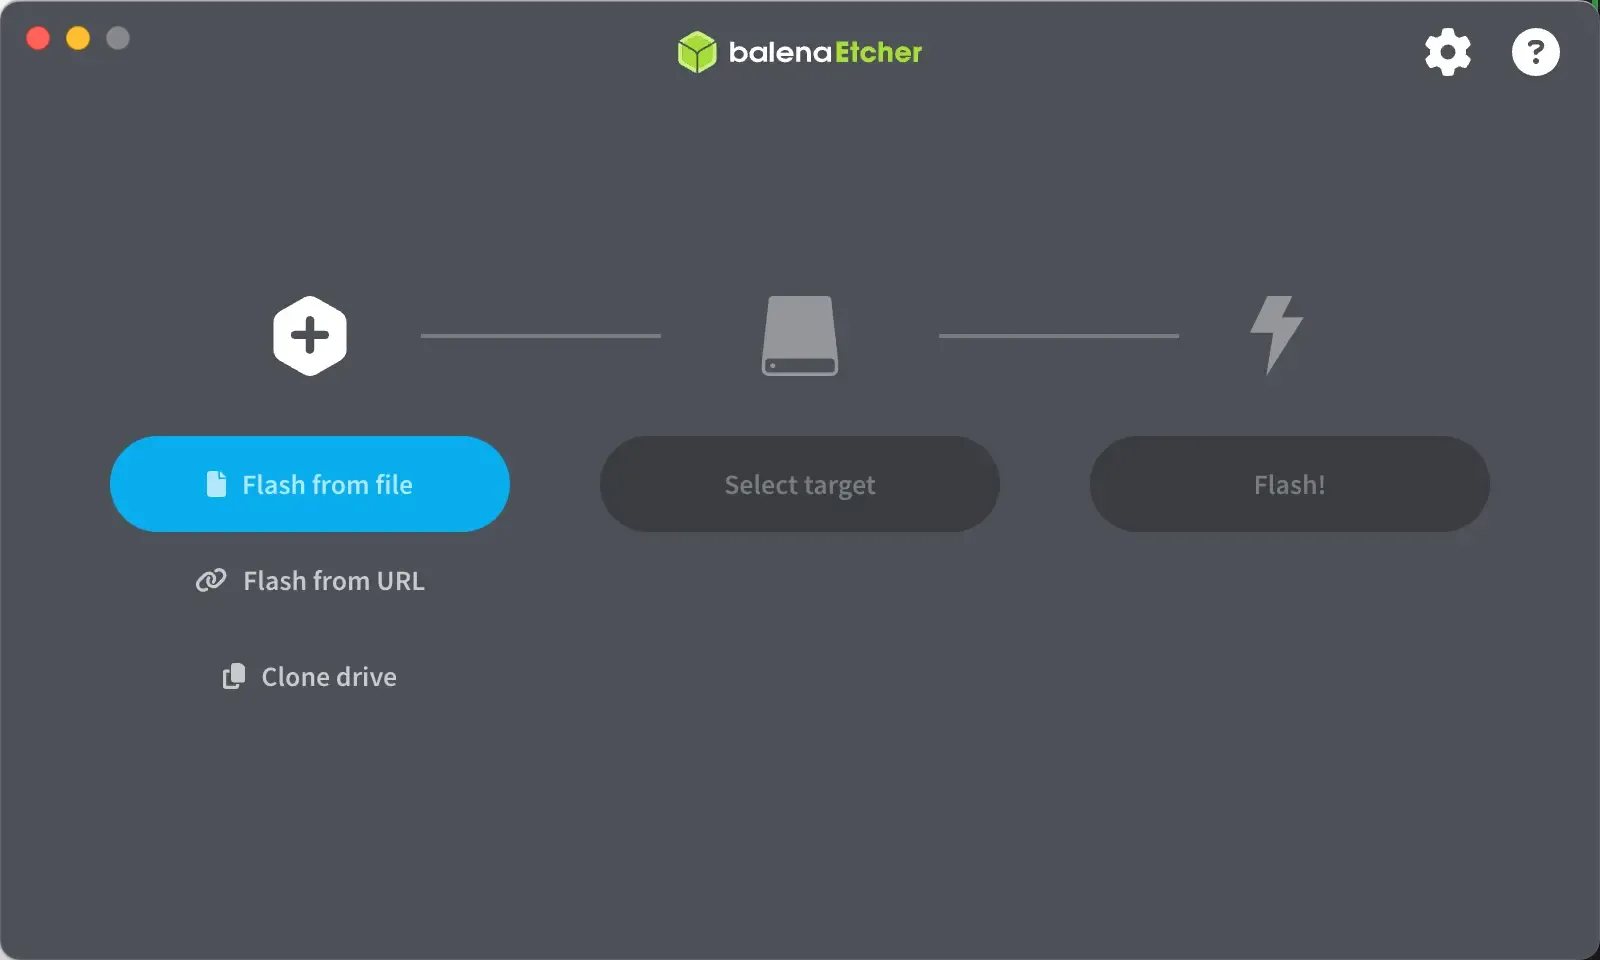
- Click
Flash from fileto select the image to flash.
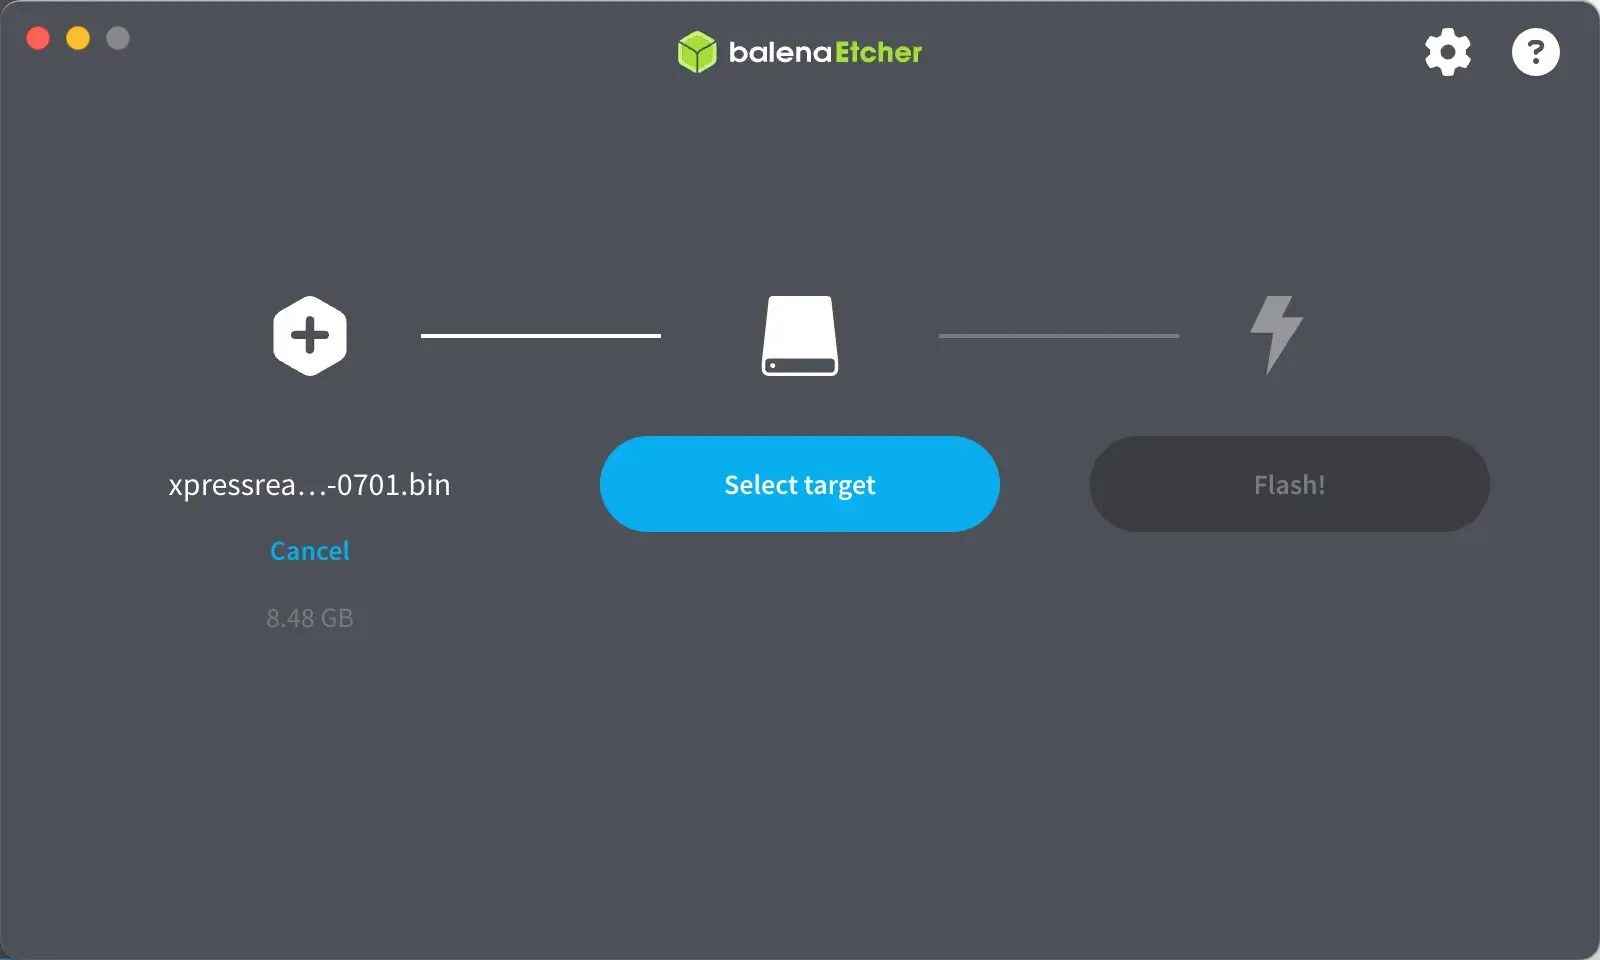
- Click
Select targetto select the device to write to.

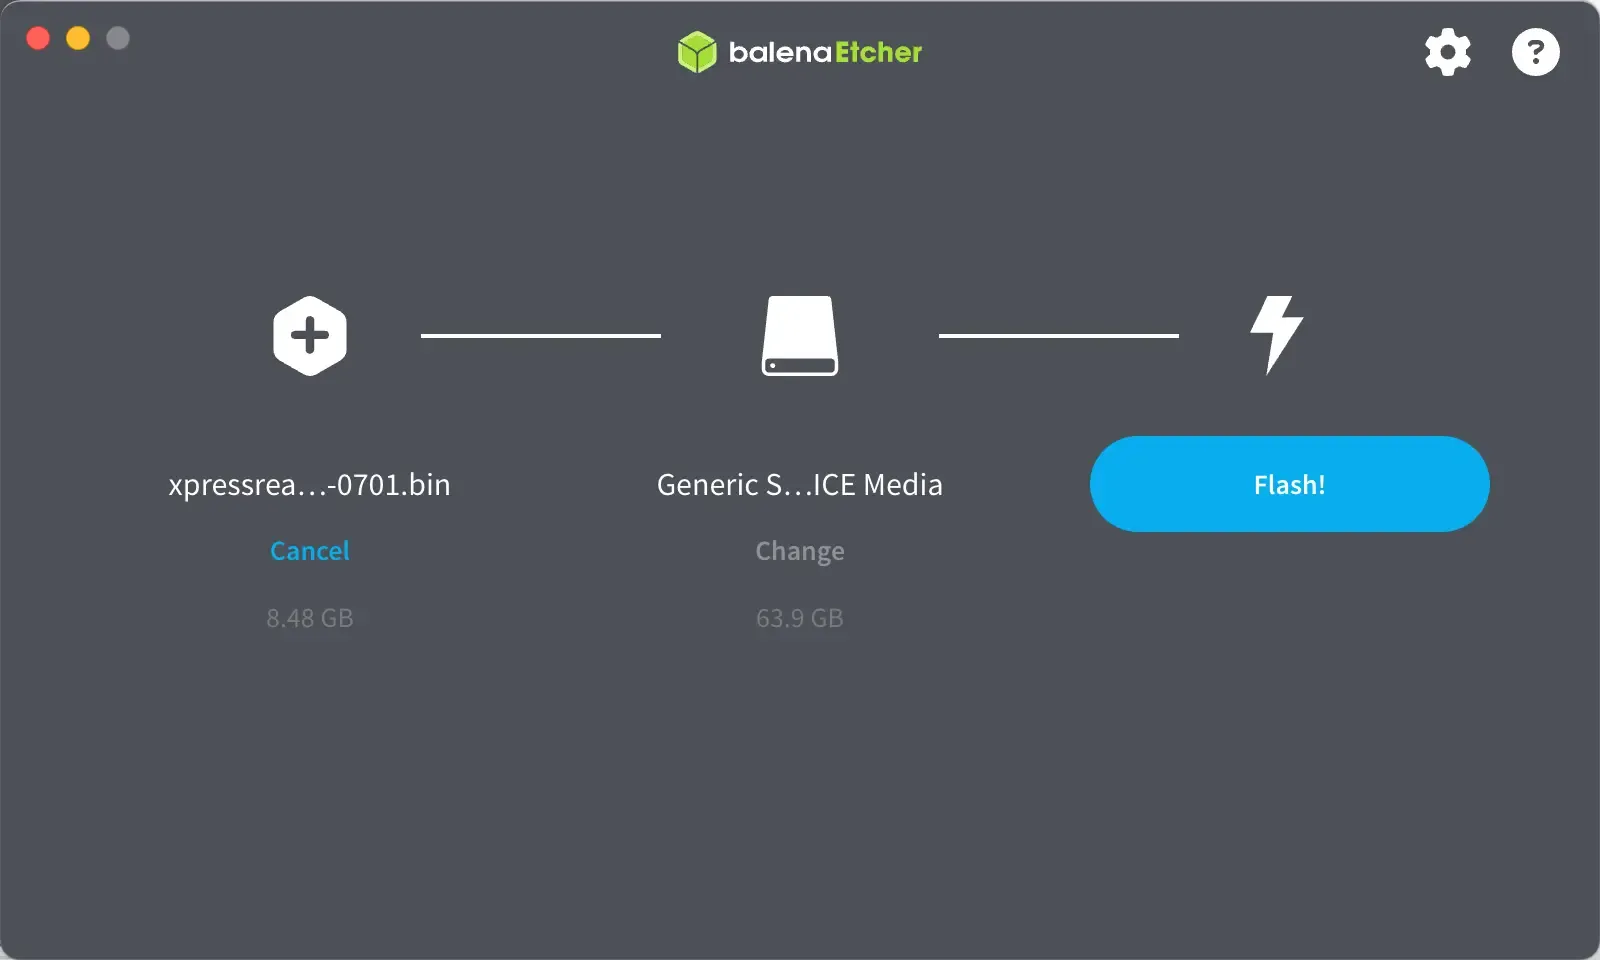
- Click
Flash!to start writing and wait for the write progress bar to complete.
Booting the System
Section titled “Booting the System”- After successfully flashing the microSD card according to the above steps, insert the microSD card into the microSD slot of the XpressReal T3.
- Connect keyboard, mouse and monitor then plug the power supply, the system in the microSD card will boot automatically.
Further reading
Section titled “Further reading”- Read Install openFyde/FydeOS for how to install openFyde/FydeOS.